An embroidered keychain or bag charm turns a logo, short message, storefront or character into a small accessory someone can carry. For a gift project, begin with where it will hang and what the design needs to communicate. A narrow text tag, a shaped embroidered charm and a textured character each offer a different way to present the same brand idea.
The examples below are design references supplied for this article. They illustrate possible formats and appearances; they are not verified YQX production samples.
Choose the gift format before adapting the artwork
A keychain usually shares space with keys and may go into a pocket. A bag charm is displayed on a handle, strap or suitable attachment point, giving the outline and texture more room to be seen. Decide which use matters most before choosing the finished size, thickness and connector.
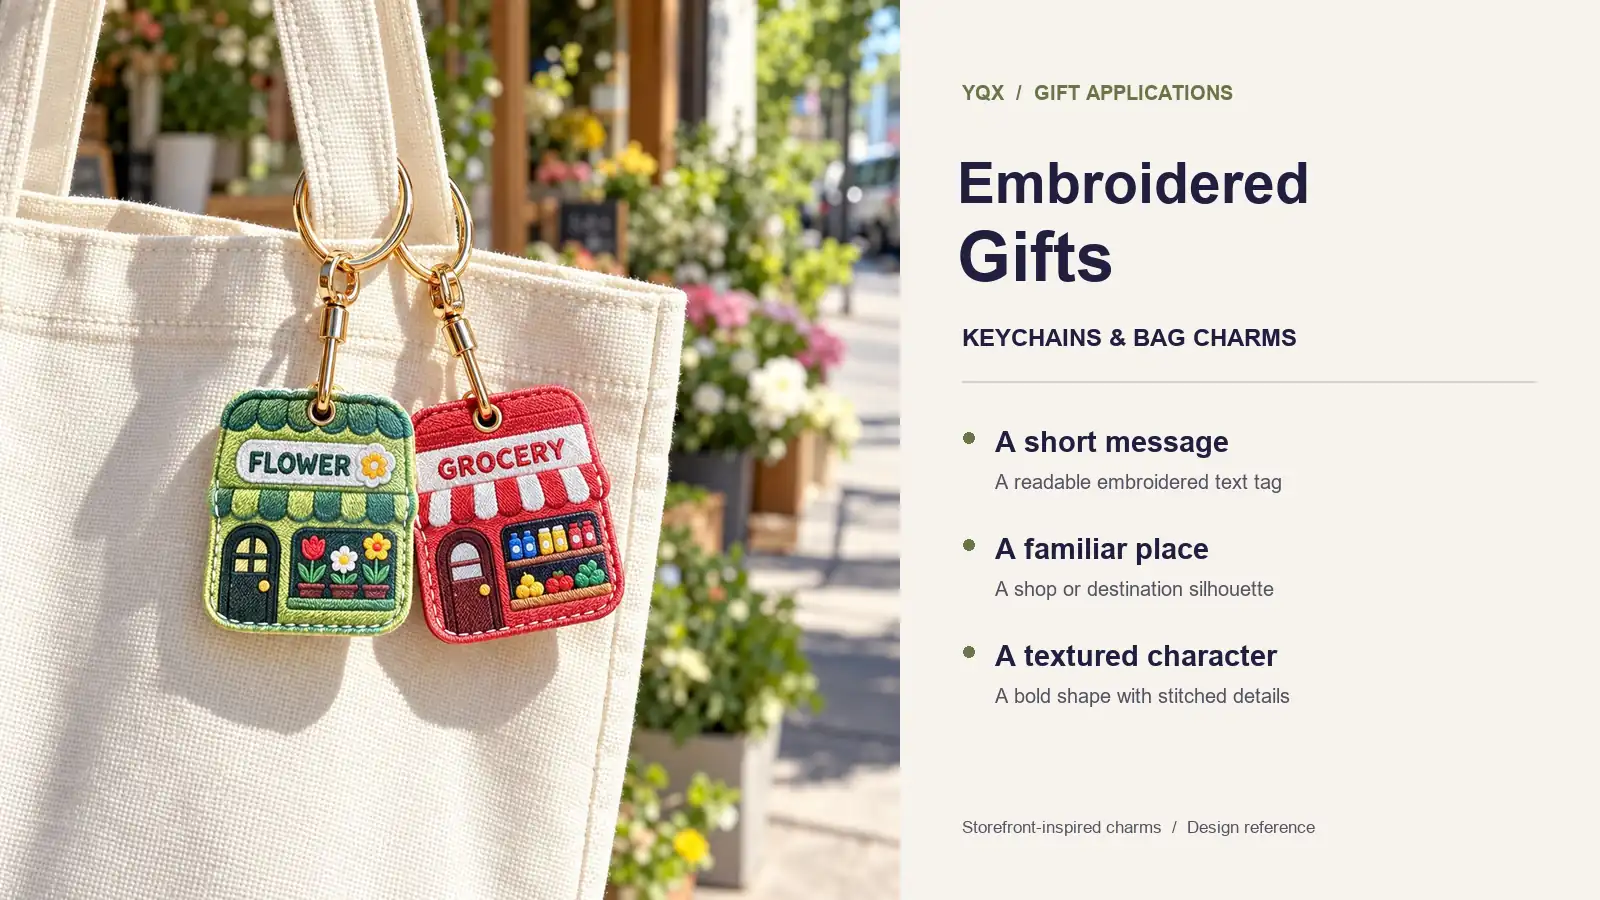
The flower-shop and grocery-shop designs in the opening image show how a familiar place can become a hanging illustration. A small-business gift could use a simplified storefront, signature product or shop name. Keep the recognizable silhouette and a few useful details rather than trying to reproduce every line of a building drawing.
| Gift format | Possible application | Design priority |
|---|---|---|
| Rectangular text keychain | Club gifts, event merchandise or travel-themed souvenirs | A short, readable message and clear color contrast |
| Shaped embroidered charm | Shop gifts, destination souvenirs or a themed collection | A recognizable outline with a planned hanging point |
| Textured character charm | Decorative bag accessories or character merchandise | Bold shapes, visible facial details and a coordinated connector |
| Small stitched motif on a smooth base | A restrained logo or simple icon gift | Confirmed base material and a deliberate reverse-side finish |
These are starting points for your own artwork. The format should serve the message, not force a detailed logo into a space where it cannot be read.
Use a strip keychain for a clear message
The colored rectangular tags demonstrate a straightforward approach: one prominent phrase, a contrasting ground color and a ring at one end. Color variants can distinguish a collection while keeping the artwork consistent. Check the lettering across every color combination, especially when a light thread becomes a dark one.
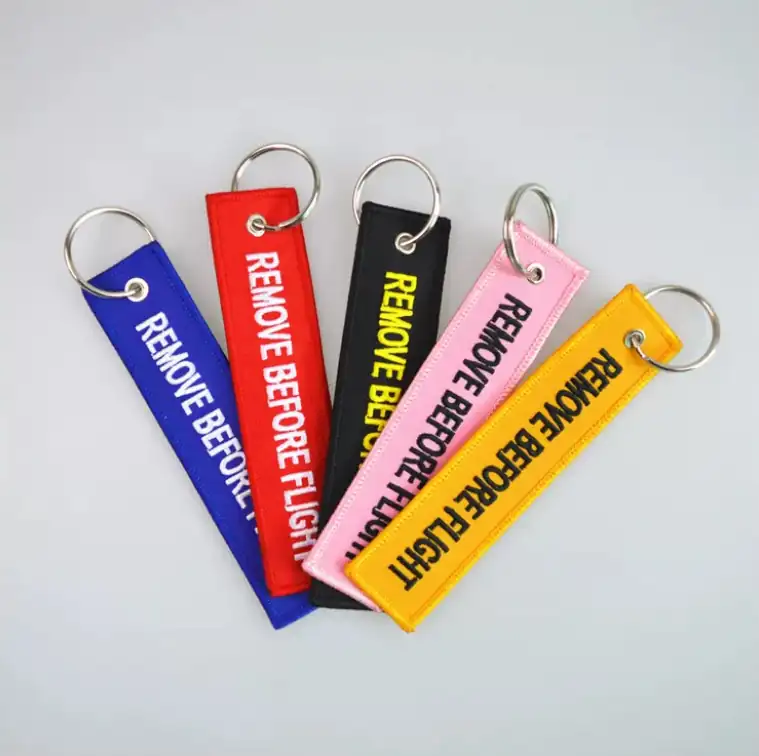
Keep a slogan short enough to remain readable at the intended finished size. Embroidery lettering is made from stitches, so a font cannot always be scaled like printed artwork. Wilcom’s explanation of embroidery fonts describes font-specific size constraints. Ask for an actual-size proof, then judge letter spacing and small openings on the stitched sample.
The white-and-red example uses “REMOVE BEFORE FLIGHT” as an aviation-inspired gift theme. Here it is a souvenir-style keychain, not an approved aircraft servicing tag. For a travel collection, a place name or original short phrase could play a similar visual role.

Let texture carry a character design
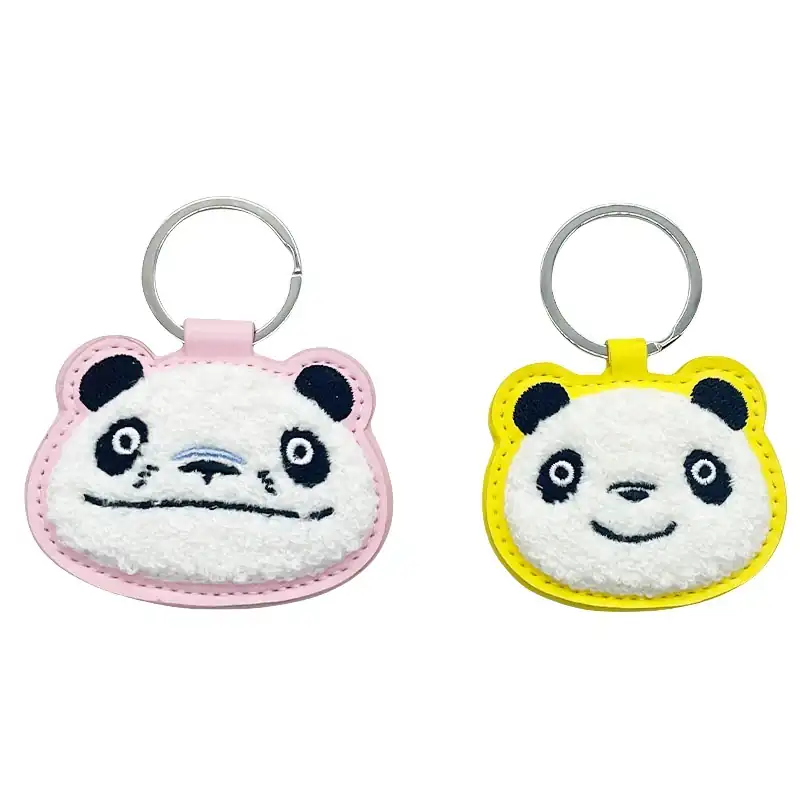
A character bag charm can communicate through its outline, colors and surface texture before the viewer reads any wording. The bag examples combine broad fuzzy areas with smaller stitched details and colorful hanging fittings. This makes the connector and cord part of the visible design, rather than a fitting chosen only at the end.

For a chenille design, reserve the raised texture for broad areas and discuss flatter embroidery for smaller details. Chenille documentation describes loop and chain stitches, including equipment that combines chenille with regular flat embroidery. The supplied pictures have a chenille-style appearance; the actual stitch method and materials must be confirmed during sampling.

The panda-face pair is another useful design lesson: large contrasting eyes and a simple mouth remain central to the expression, while the colored surround defines the shape. When adapting your own character, prioritize those identifying features before adding small decorative details. Compare the silhouette and expression at actual size, not only in an enlarged digital view.
For development options, see YQX’s custom chenille patches and discuss how the design would be finished as a hanging accessory.
Specify the reverse and the complete attachment
A suspended accessory can turn over during use. Decide whether the back repeats the artwork, carries a second message or has a clean plain finish. Supply both views in the brief, even when the reverse is intentionally blank.
The round brown example shows a stitched bear motif on the front and a plain reverse. Its smooth, leather-look appearance is a design reference, not proof of genuine leather. Confirm whether the proposed base is leather, synthetic material or another construction before approving its feel, finish and color.
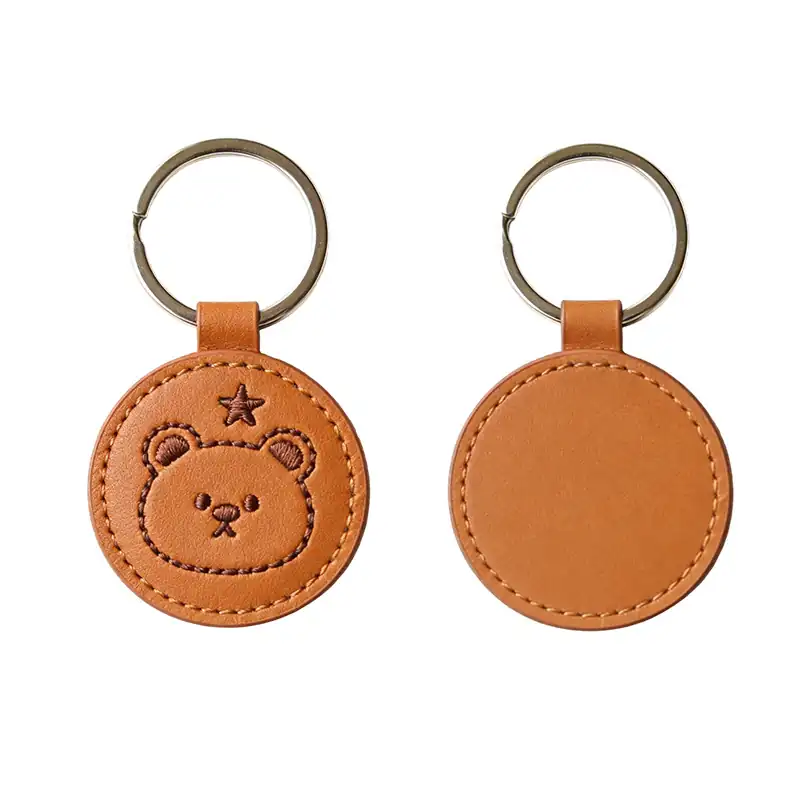
Plan the attachment position on the artwork. An eyelet through the body, a sewn top tab and a cord loop create different hanging arrangements. Ask the supplier to show the complete construction, including the connector, finished edge and reverse. A ring for keys and a clip for a bag handle may require different access and opening space.
Do not choose an edge solely by appearance in a photograph. A simple rectangular outline and a shaped character need their own finishing discussion, based on the selected base material and assembled design. YQX’s embroidered patch options include a patch-keychain application that can be used as the starting point for that discussion.
Approve the assembled gift, not only its front artwork
Request a physical sample with the intended hardware and reverse finish. Place it on the type of keys or bag attachment point it is meant for, and review the whole accessory:
- Artwork: can you read the words and recognize the character at finished size?
- Hanging position: does the design face the intended direction, or does the connector cover an important detail?
- Front, reverse and edge: are loose threads, exposed construction or unexpected materials visible when it turns?
- Contact with the bag: does the chosen fitting attach and move as intended, and does the texture catch on nearby surfaces during handling?
- Gift presentation: does the assembled item fit the planned card, pouch or other packaging?
A screen proof is useful for layout and spelling. It cannot establish the feel of the base, how the assembly hangs or how the fitting operates. Keep the approved physical sample and written specification together for the production order.
Prepare a brief for your custom gift
Send the front and reverse artwork, intended use, finished dimensions, color references, quantity, preferred texture, base material, attachment position and hardware. Include the packaging plan, delivery destination and required date so the supplier can confirm what is feasible for the project.
If you have only a concept, start with the format and the feature that should remain recognizable: a short phrase, a shop silhouette, a character expression or a simple stitched icon. Contact YQX about the custom gift project to discuss the construction and sampling needed to turn that idea into an embroidered keychain or bag charm.
Featured image note
Storefront-themed charms illustrate a design idea for custom gifts; the cover uses a supplied reference image.