Computerized bead and sequin embroidery can repeat decorative motifs across garment panels, bag components and other textile pieces. A compatible feeding device presents the embellishment to the embroidery head, while programmed stitches secure it to the fabric. The result can combine ordinary thread embroidery, raised bead details and reflective sequin surfaces within one design.
For bulk production, the important starting point is an agreed combination of artwork, embellishments, fabric, placement and attachment method. Develop that combination on a stitched sample, then check repeated pieces using the same specifications. The images below show equipment, material choices and design applications; they do not establish a production rate or prove that every visible detail was applied automatically.
How computerized bead and sequin embroidery works
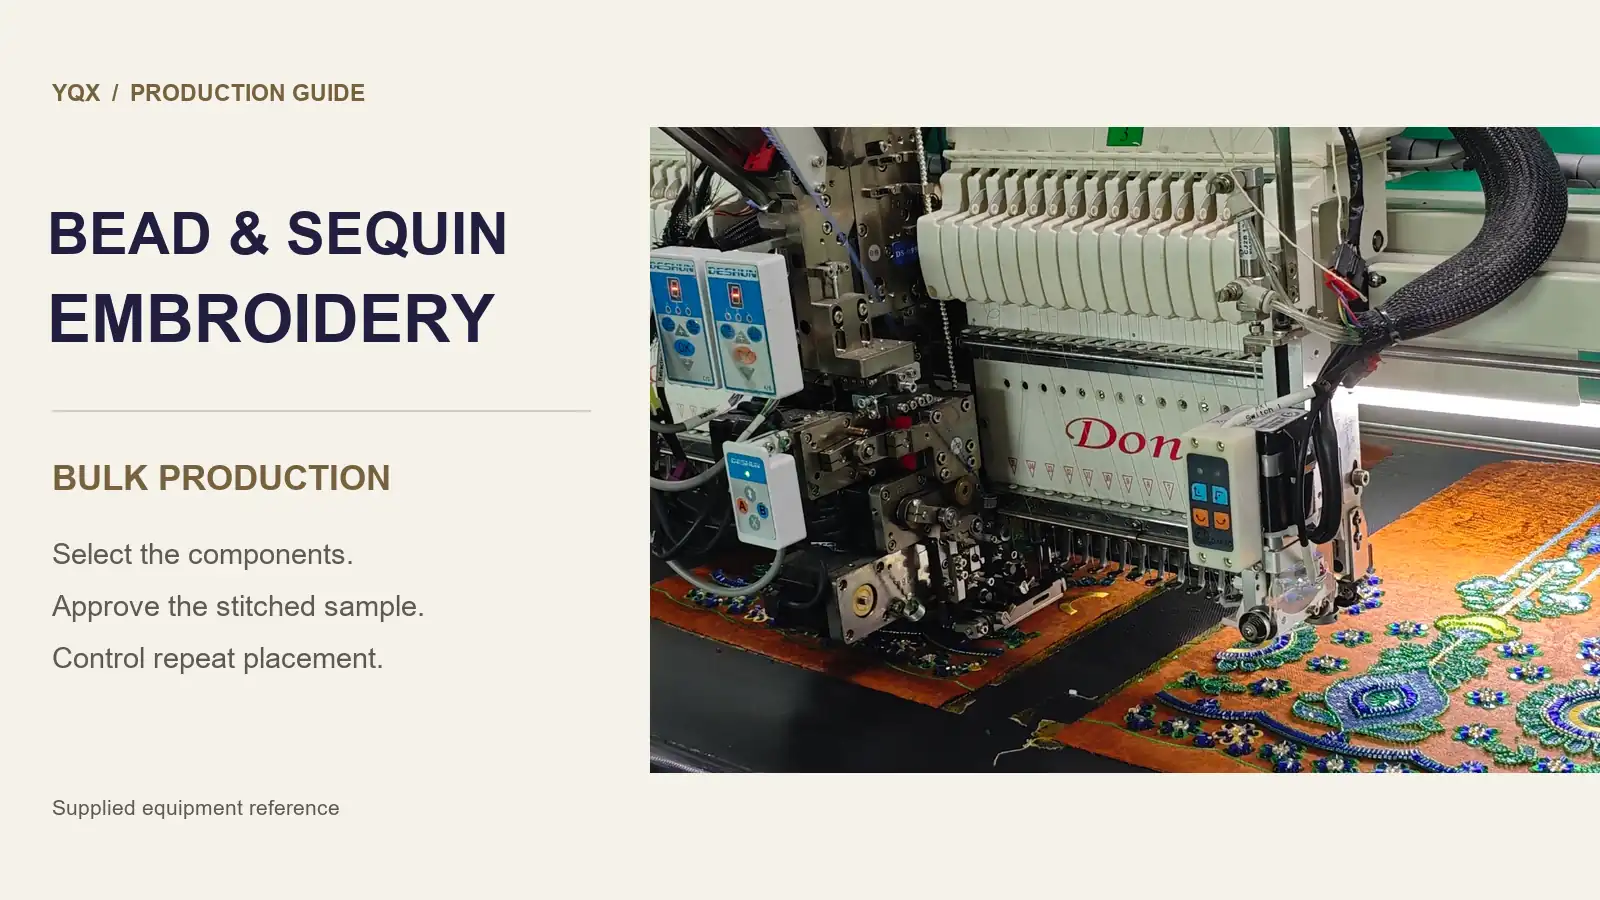
Industrial embroidery equipment can use dedicated bead or sequin devices alongside the embroidery needles. Tajima's factory options show both types and make clear that available attachments depend on the machine model. The machine follows prepared design data to coordinate placement and stitching.
The feeding method also depends on the equipment. For example, Tajima's Seed Bead Device uses beads held in special tape reels. That describes one system; it does not mean an arbitrary loose bead or every shape on a sample card can be loaded into the same device.

Ask the supplier to confirm which parts of the design will be machine stitched and which require separate finishing. A design may combine automated embroidery with additional attachment work. Its appearance alone cannot tell you the production route, and the number of colors in a reference image does not identify the machine's simultaneous feeding capacity.
Define the repeat before developing the sample
For a garment order, specify the decorated panel, its dimensions and the motif's position relative to a construction reference such as the center front or a marked seam line. Include the permitted decoration area and any space that must remain clear for joining, folding or trimming.
The matching brown-panel reference shows why this matters. A motif that looks attractive on one piece still needs to sit correctly on its partner. Confirm whether paired parts use mirrored artwork, matching placement or deliberately different details. Provide placement information for each size or panel version instead of simply enlarging the approved motif.

Keep a version identifier on the artwork, placement sheet and sample record. If the decorative area, material or panel shape changes, review the affected sample before releasing that version for production. This gives the buyer and factory a common reference when checking later pieces.
Specify beads and sequins as production materials
Choose beads by their physical specification
Beads add height and distinct highlights. The sample card includes several visible shapes and colors, but the photograph cannot confirm their composition, dimensions or feeding compatibility. Select actual material samples and identify the supplier reference, shape, size, hole dimensions, color and surface finish in the production brief.

Confirm the chosen bead with the proposed device and stitched construction. Similar-looking substitutes can change the appearance or require a different setup. Record the accepted material reference and agree how any proposed substitution will be sampled and approved.
Choose sequins for the intended surface effect
Sequins provide flat or shaped decorative surfaces that catch light. The sequin card shows a range of apparent finishes and colors. Specify the selected reference, dimensions, shape, hole position and finish, then confirm its supplied form with the factory.

The stitches holding a sequin are part of the construction. Wilcom's sequin-fixing guidance explains that fixing choices depend on factors including the sequin's shape, weight and customer requirements. Judge the intended surface appearance and attachment together on the sample.
Digitize the complete combination of materials
An artwork file needs to become machine-compatible embroidery data. Bead positions, spacing, orientation and fixing stitches must work with the actual materials and equipment. Wilcom's Beading Supplement describes these controls and the need for a machine format that supports bead output. A software preview helps plan the design; a stitched sample confirms the physical result.
The detailed floral reference combines several visible embellishment shapes and thread areas. Use a reference like this to mark which elements are essential, which may be adapted for the proposed equipment, and which need a separate operation. Agree the order of operations and any finishing work during development.

Review where the materials meet: a bead line beside a sequin fill, a flower center above embroidered petals, or an outline around a raised area. Ask whether the approved arrangement remains clear at the finished size. Changes to spacing or material size should be assessed on the actual design rather than accepted from the screen alone.
Plan the decoration around the final product
Separate motifs and appliqué components
The butterfly, flower and leafy branch reference shows a way to develop individual decorative components. If a motif will be made separately and attached later, specify its finished boundary, base material and attachment method. Approve the complete attached sample as well as the standalone component.

Garment panels and finished clothing
A compact floral motif can add a focal detail to a hoodie or similar garment. Decide whether the factory will decorate a panel before assembly or work on a finished garment. The intended material and access to the decoration area should be included in sampling. Check placement when the garment is worn, the fabric around the motif and the finish on its reverse.

Bag components
The tote reference uses larger floral motifs with smaller accents spread across the visible panel. Provide a placement map if several motifs form one composition. Review their positions relative to seams, handles, folds and any lining, and discuss how decorated components will be handled during assembly.

YQX's garment panel embroidery and handbag embroidery pages provide relevant starting points for these applications. The reference images do not establish a particular fabric specification or confirm that their full embellishment combinations are suitable for the same production setup.
Move from an approved sample to repeated production
Approve the actual combination of fabric, embellishments, embroidery data and finishing. Keep the accepted physical sample together with its material list and placement sheet. Photographs are useful supporting records, but they cannot fully show attachment, reverse finish, weight or how the decorated piece behaves when handled.
Before releasing the full order, review a short production trial using the planned setup and materials. Compare several repeated pieces, including different active heads where relevant, against the approved sample. Check the production route at its intended operating settings. Wilcom's bead guidance calls for testing each bead type and checking for feeding and stitching problems, including missing or damaged beads.
Use the trial to review actual cycle time, loading, material changes, inspection and agreed finishing work. A machine's advertised maximum speed does not establish a finished-piece output rate or delivery schedule for your design. Base the production plan on the confirmed construction and trial results.
The following checks turn a general request for "consistent quality" into specific points to agree:
| Check | What to compare | Information to retain |
|---|---|---|
| Placement | Motif position, paired-panel relationship and clearance from construction lines | Approved placement sheet and panel version |
| Materials | Selected shapes, sizes, colors and finishes throughout the design | Material references and approved samples |
| Attachment | Missing, damaged or insecure embellishments and the intended fixing appearance | Accepted construction and defect examples |
| Fabric and reverse | Distortion, unwanted marks, loose threads and the agreed reverse finish | Fabric, support and finishing specification |
| Care and handling | Appearance and attachment after the agreed product care or handling review | Test conditions and approval record |
Agree the acceptance criteria and inspection plan before bulk production. When an issue appears, identify the affected pieces, resolve the cause and check the corrected setup before continuing. If a material lot or a meaningful setup change affects the result, compare new pieces with the approved sample again.
Care and handling expectations belong to the finished product. Ask for a review suited to the selected fabric, thread, beads, sequins and attachment. There is no universal washing or durability promise that can be read from a decorative photograph. Include packing requirements so raised surfaces receive appropriate handling between embroidery, assembly and shipment.
Prepare a bead and sequin embroidery project with YQX
YQX offers sequin and bead embroidery for garment panels, and its handbag embroidery range also includes these decorative techniques. The production method should be confirmed for the particular design and materials.
For a useful project review, send the artwork and visual references, finished motif dimensions, panel or product details, placement instructions, fabric information, preferred bead and sequin samples, quantities by version, intended care and any assembly requirements. Identify features that must be retained and those that can be adapted during sampling.
Contact YQX to discuss the material combination, embroidery approach, sample development and bulk production requirements. A clearly approved sample gives both sides a practical basis for checking the repeated pieces.
Featured image note
Editorial cover using supplied embroidery equipment and decorated-panel references; the photograph does not establish the machine model or production rate.