You can request an embroidered-patch preview with one short sentence. Upload your artwork to an AI image editor that accepts reference images, ask for the embroidery style and border you want, and compare the result with the original. The demonstration below shows this approach with full embroidery and a merrowed border. It makes the proposed look easier to discuss before moving to a sewn sample.
Start with your artwork
Use the design you actually want to turn into a patch. A clear image gives you a useful reference for the lettering, colors and outline. Keep the original beside the generated result so you can spot changes rather than judging only whether the mockup looks attractive.
Choose an image-editing tool that lets you upload an image and describe the change in ordinary language. For example, Adobe documents this upload-and-prompt editing workflow. The exact controls vary by tool; the task is to edit from your supplied artwork, with the design still available for comparison.
If you are still preparing the source design, the YQX artwork preparation guide covers the information to organize before sampling. An AI preview is most useful once you know which artwork you intend to keep.
Copy this one-sentence prompt
Upload the artwork, then try:
Turn the uploaded artwork into a full-embroidery patch mockup with a merrowed (overlocked) border, keeping the original lettering, colors and outline.
The sentence identifies the reference image, the desired embroidery coverage and the edge treatment. “Full embroidery” asks for an embroidered surface across the design. “Merrowed border” describes the wrapped, overlocked edge appearance you want to see. Asking to keep the original design gives you a clear basis for checking the result.
In the supplied demonstration, the request was written as two settings: a merrowed border and full embroidery. The screenshot below preserves that request and its generated result. The one-sentence version above combines those settings and adds a reminder to preserve the artwork; it is a suggested prompt, rather than a claim that those exact words produced this screenshot.
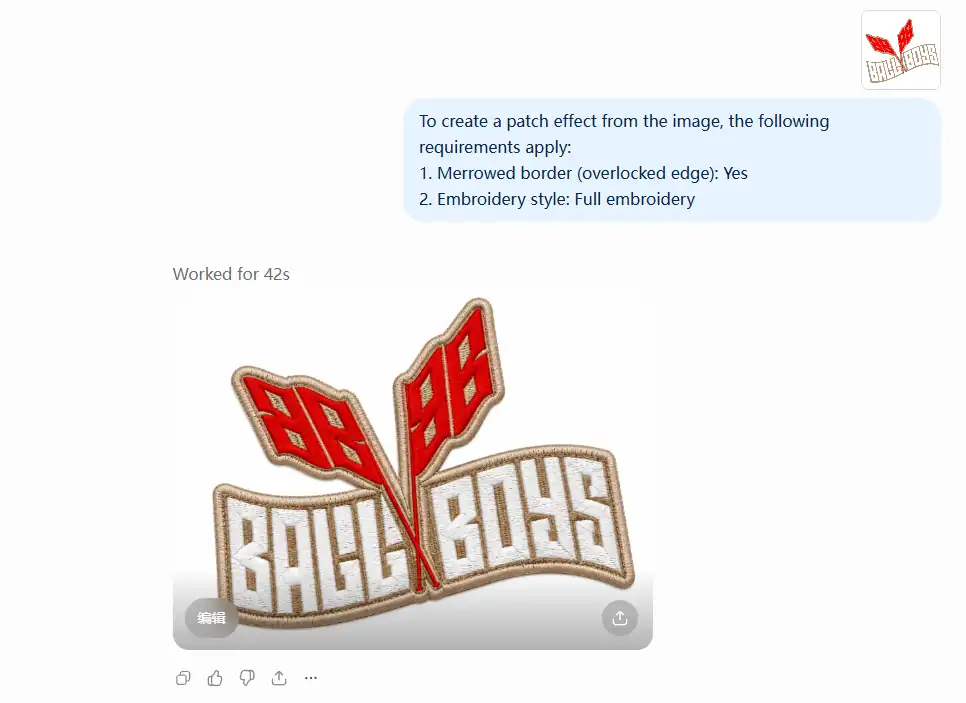
The result shows a raised-looking thread texture, a beige edge and red details. This helps a buyer or designer imagine the patch treatment without first explaining every visual detail in a long message. Generation time and design accuracy vary; the useful next step is a side-by-side comparison with the original.
Check four things in the preview
Start with the artwork itself, then look at the proposed embroidery treatment.
| Check | What to look for | Useful next action |
|---|---|---|
| Lettering and details | Changed letters, missing marks, altered spacing or moved elements | Compare word by word and request the exact correction |
| Outline and proportions | A stretched shape, filled gap or a different relationship between parts | Ask to preserve the original outline and open spaces |
| Embroidery and edge appearance | Whether the coverage and border create the look you intended | Describe the visual change you want, then compare the whole result again |
| Color and contrast | Whether the major color areas remain recognizable and details stand out | Keep the intended color references for the supplier |
An attractive thread effect can distract from a changed letter or an extra shape. Zoom in on those details, then return to the full view to judge the overall balance. In an irregular design like the example, follow the outline around each projecting part and check that the AI has not joined areas that should remain separate.
Use the color preview to discuss the arrangement and contrast. For actual thread matching, keep a physical reference or agreed thread code: Madeira recommends physical shade cards for precise color comparison, because screen and printed reproductions can differ from the thread.
Refine the part that needs attention
If the first result changes an important detail, make the next request specific. For example: “Keep the lettering exactly as in the uploaded artwork and change only the border appearance.” Reuse the original as a reference and compare the revised image against it.
If you prefer a different edge or coverage, change that part of the request. You do not need a complicated prompt to start a visual discussion. You do need to check whether the requested change also affected lettering, proportions or other parts you had already accepted.
Save the version you want to discuss and note the requested treatment. This gives the supplier both the original artwork and a visual explanation of the intended look.
Take the preview into the sampling discussion
Send the original artwork and the selected mockup together, along with the finished dimensions, quantity, backing and intended application. Label the mockup as an AI preview and ask the supplier to confirm how the outline, small details and edge treatment can be produced at the required size.
A visual mockup does not contain the production decisions needed to run an embroidery machine. Wilcom explains that embroidery files carry stitch information and machine commands. A rendered thread effect cannot confirm stitch density, underlay, stitch count, color matching or attachment performance. Those questions belong in digitizing, sampling and the applicable physical checks.
The benefit is a clearer starting point: one simple prompt can help you show the appearance you want and identify design changes worth discussing. Once that appearance is clear, use a sewn sample to review the actual result. To discuss custom embroidered patches with YQX, prepare those files and specifications and send them with your sampling request.
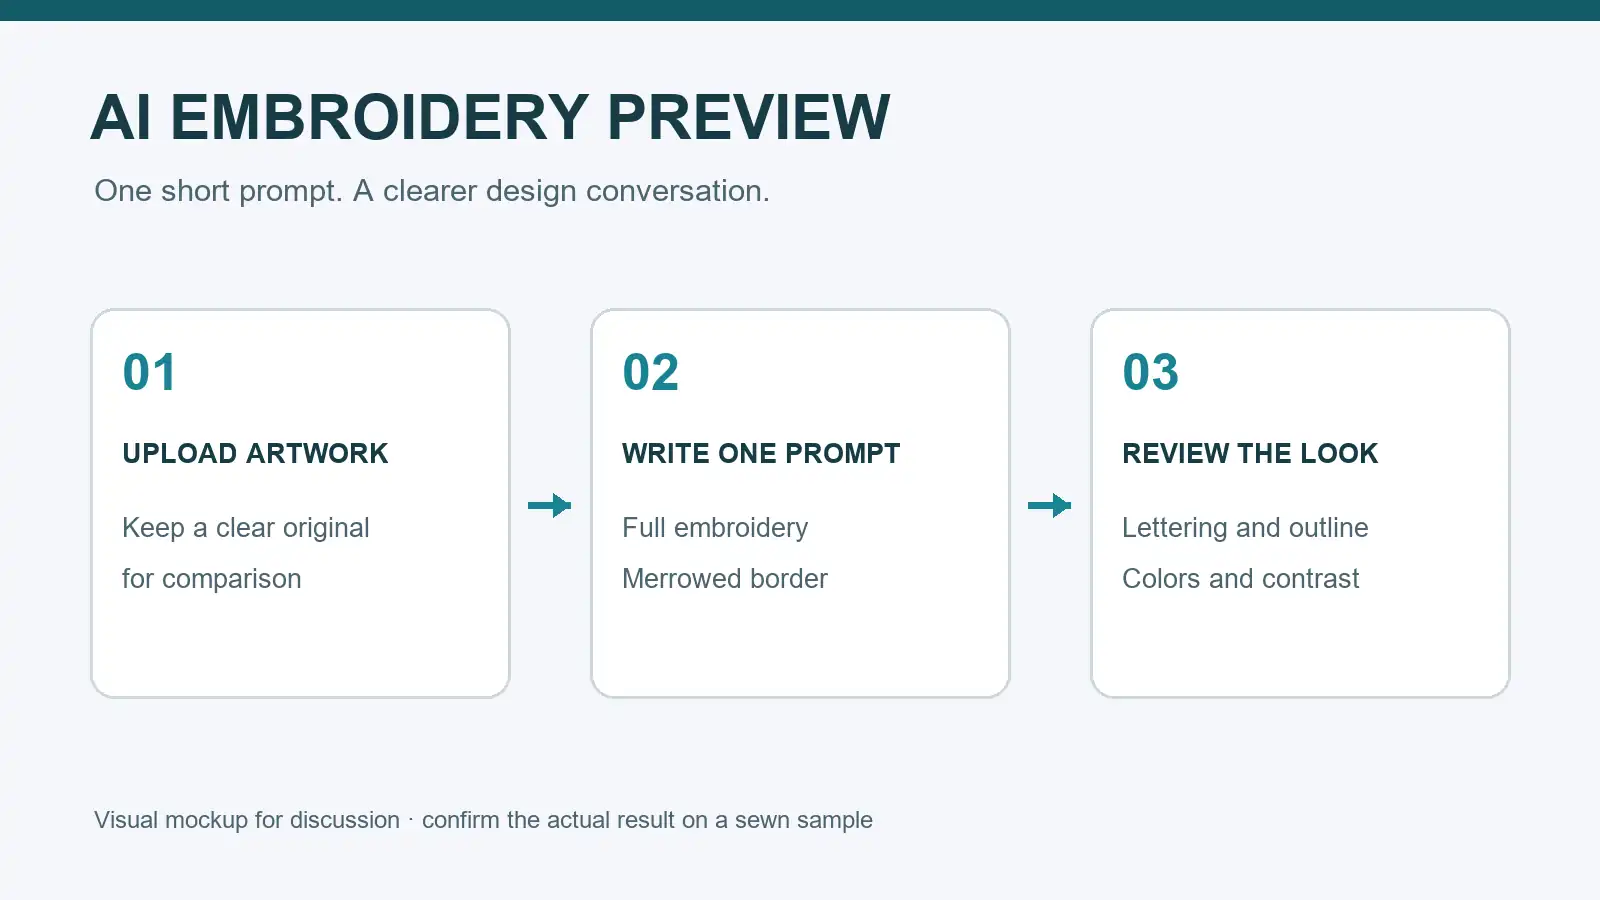
Featured image: Original workflow diagram showing artwork upload, a short prompt and visual review; it does not depict a sewn sample or production test.