Embroidered Patches vs. PVC Patches: Which Is Better for Outdoor Gear?
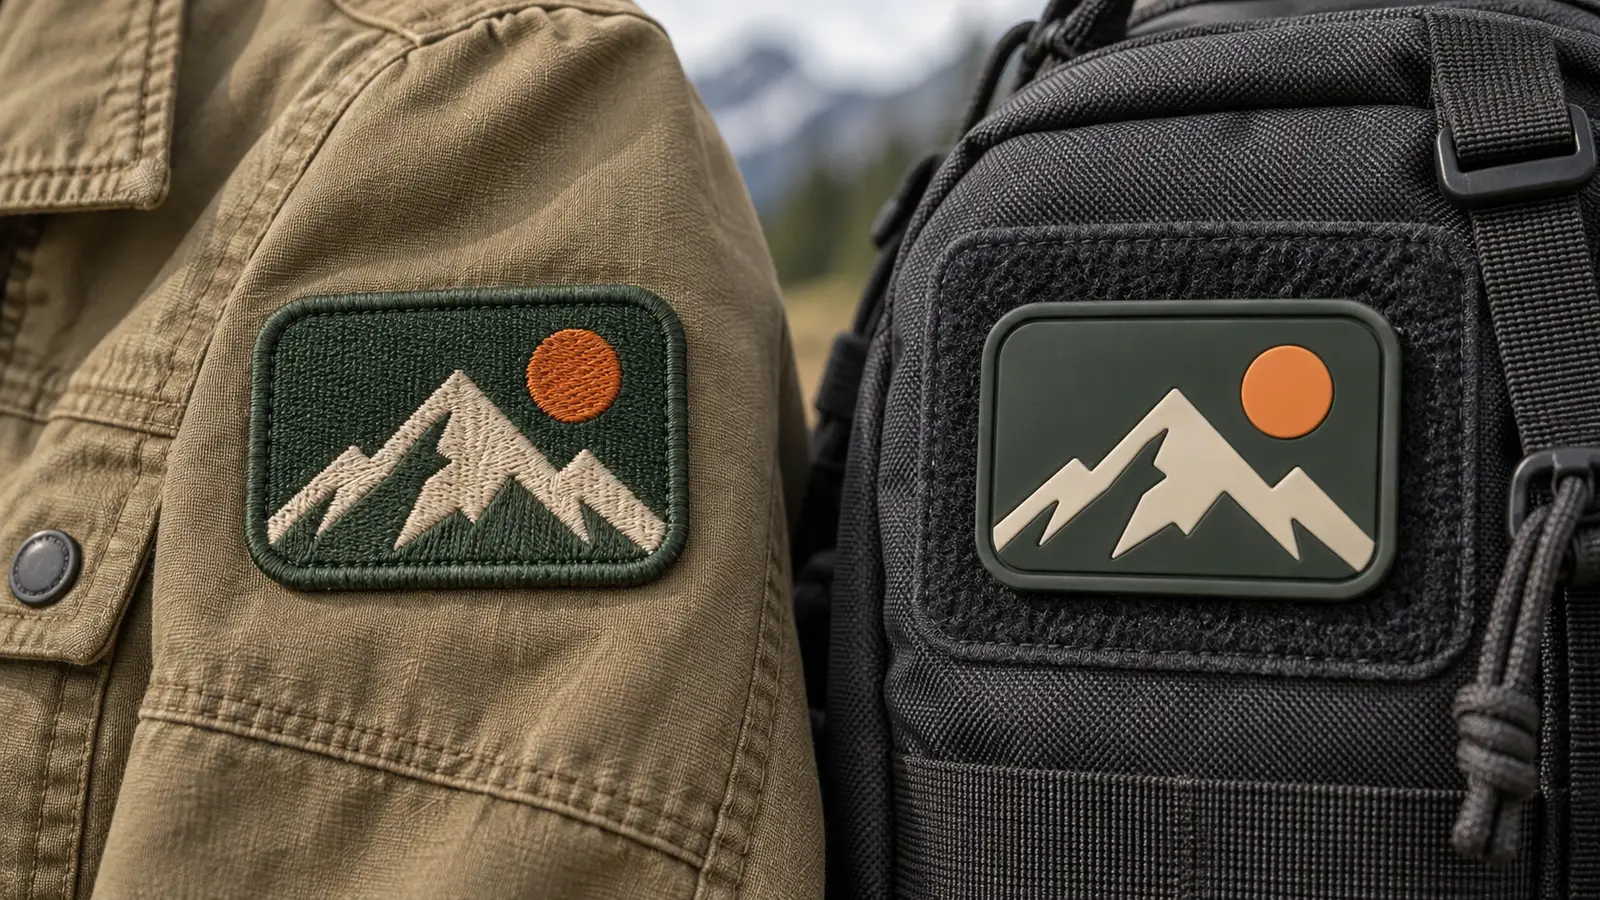
PVC patches are often the better starting point for outdoor bags that regularly get wet or muddy. Embroidered patches suit clothing and gear where a textile finish and comfortable fit matter most. These are selection starting points, not measured rankings: the finished construction can change the result. A thick backing can make embroidery stiff, while a thin molded PVC patch can flex well. For abrasion, repeated bending and attachment security, compare production samples on the actual bag or garment before ordering in bulk.
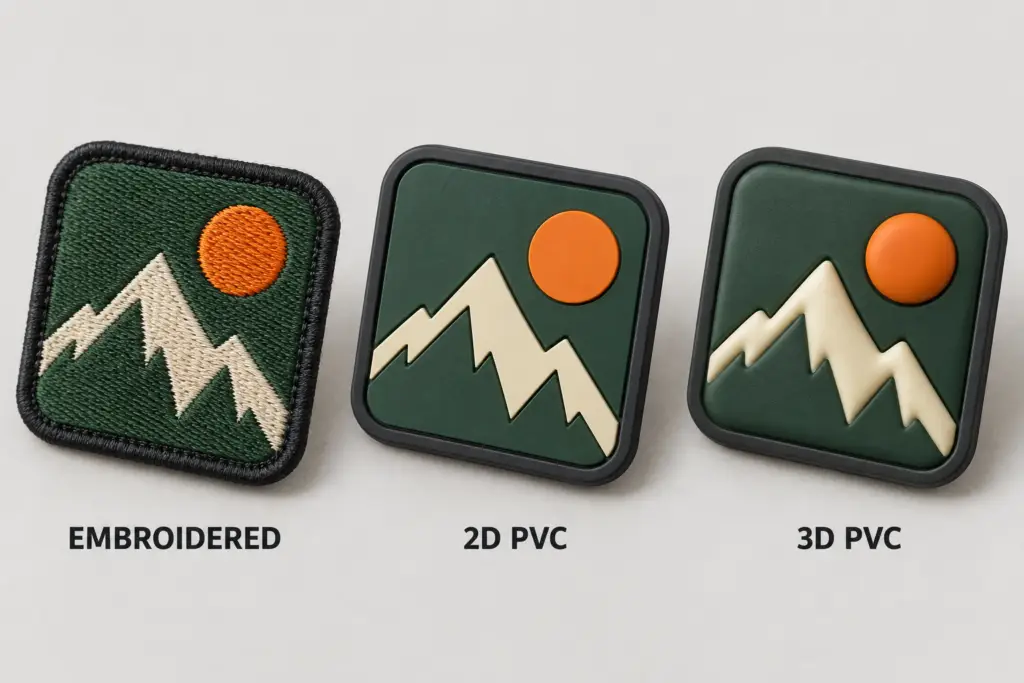
Stitched texture and molded relief create different results
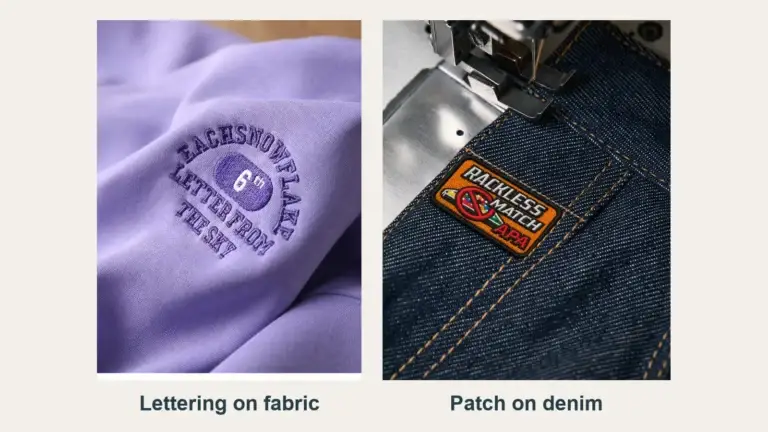
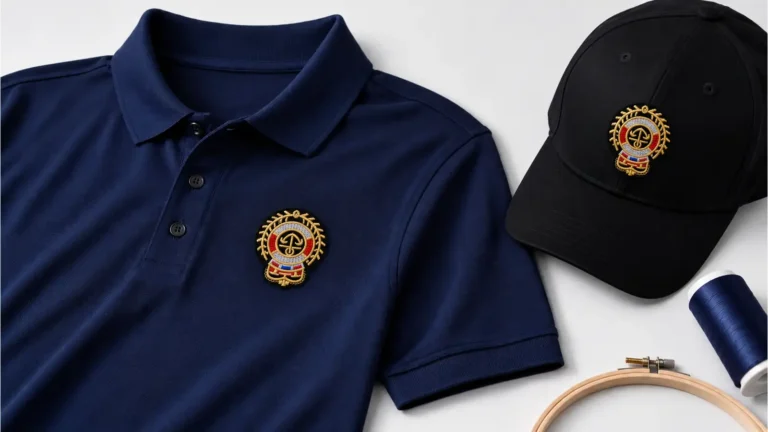
An embroidered patch uses thread stitched into a fabric base. Stitch direction, coverage and the border create its texture. Standard embroidery already has visible depth; 3D puff embroidery adds foam beneath suitable stitched elements for more pronounced relief. Both constructions are shown on YQX’s embroidered-patch page.
A PVC patch is molded from flexible polyvinyl chloride, a plastic with a rubber-like feel. The formulation, thickness and backing all matter when judging softness. Emblemtek describes how plasticizers give its molded PVC emblems their flexibility.
In common supplier terminology, 2D PVC can still have raised levels: the tops of those levels are flat. Sculpted 3D PVC uses rounded or contoured elements. The distinction concerns surface geometry, as explained by The Monterey Company. Ask for a side view of the proposed design because suppliers may use these labels differently.
| Decision factor | Embroidered patches | PVC patches |
|---|---|---|
| Surface character | Visible thread, stitch direction and fabric texture | Molded color areas with defined raised or recessed features |
| Dimensional effect | Stitched relief; optional foam-supported puff | Flat-topped levels or sculpted contours |
| Wet and dirty use | Check retained moisture and dirt within the textile construction | Check how easily the face and recesses clean, plus moisture behind the patch |
| Rubbing and snagging | Inspect thread fuzzing, broken stitches and border wear | Inspect scuffs, cuts, damaged relief and attachment stitching |
| Repeated flexing | Judge the fabric, stitch coverage and backing together | Judge the molded thickness, formulation and backing together |
For either material, approve lettering at the finished size. A large digital drawing cannot establish whether small text will remain readable on the physical patch.
What happens in rain, dirt, abrasion and repeated bending?
Water: evaluate the face, backing and attachment
PVC suppliers describe their molded emblems as water resistant or waterproof. That supports considering PVC for exposed equipment, but it does not establish that the assembled patch, its textile backing or the equipment underneath will stay dry. See Emblemtek’s PVC material description.
With embroidery, moisture can remain between threads, in the base fabric or in backing layers. Polyester thread is worth specifying for outdoor samples: Madeira identifies polyester embroidery threads as suitable for outdoor items, damp conditions and frequent cleaning. This does not make the complete patch waterproof.
Check both sides after exposure. Rain splash, repeated soaking and immersion are different use conditions, so the sample plan should match the intended activity.
Dirt: compare cleaning effort and the remaining appearance
A relatively smooth molded face is a sensible first choice when wiping off mud is a priority. Deep recesses and raised borders still need attention. On embroidery, inspect dirt caught between stitches and around the border rather than judging only the exposed background.
This is a practical expectation based on construction; verify it with comparable mud exposure and supplier-approved cleaning. Record the cleaning time, method and remaining discoloration. If the patch is removable, also check the hidden fastener and loop panel. A clean logo does not establish that the attachment is clean.
Abrasion: look for the failure mode at that position
Embroidery can develop fuzzy threads, snagged stitches or a worn border. PVC avoids exposed face yarns, but its surface can still be scuffed or cut. Molded relief, perimeter stitching and the bond to the backing also deserve inspection.
Placement matters. A patch under a moving shoulder strap faces different contact from one on a clear backpack panel. Start by moving the patch away from continuous rubbing where possible, then compare wear and logo readability in the proposed location. Material names alone cannot establish service life.
Repeated bending: test the entire patch while the gear moves
Repeated bending at the waist, crouching, elbow movement and folding an empty bag can lift patch edges or strain the attachment. Check the patch across the real fold or curve, including whether it restricts garment movement or presses uncomfortably against the wearer.
Do not assume that embroidery always bends more easily. Dense stitching and a firm backing can change its behavior. Equally, PVC’s flexibility must be assessed at the actual thickness and size. Try a smaller patch or a different position if either sample bridges a fold or catches at its edges. For cold-weather gear, include the intended temperature conditions in the evaluation.
Match the attachment to the actual bag or garment
Choose the patch material and attachment together. An attractive sample on a desk says little about how it will sit on a curved sleeve, a loaded backpack or a coated shell.
| Attachment | Practical application | What to verify |
|---|---|---|
| Sew-on embroidery | Permanent branding on suitable woven clothing or bag panels | Access for sewing, fabric puckering, border security and any waterproof layer underneath |
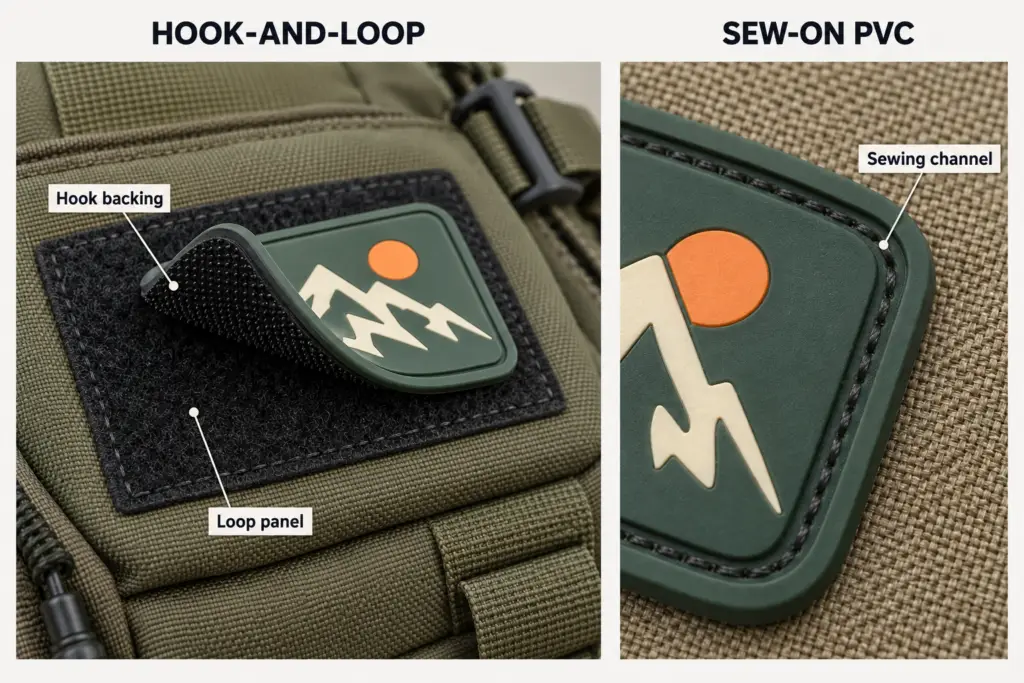
| Sew-on PVC | Permanent molded branding on suitable bags or apparel | A designed sewing channel, usable border space and attachment instructions |
| Hook-and-loop, either face material | Existing loop fields on packs or garments; interchangeable identification | Matching hook and loop, full contact, edge security and whether both sides are included |
| Heat-activated backing | Products and fabrics explicitly approved for heat application | Exact patch instructions, fabric/coating compatibility, temperature, pressure and dwell time |
| Pressure-sensitive adhesive | Positioning or an application specifically validated by its supplier | Compatibility with the substrate, wet exposure, flexing and expected attachment duration |
A PVC sewing channel is a recessed path near the perimeter for stitching. A-B Emblem describes using this channel for both garment attachment and sewn hook backing.
Hook-backed patches require a compatible loop surface; ordinary backpack fabric is not automatically suitable. Check the connection from patch to hook backing, hook to loop, and loop panel to the gear. For its fasteners, Velcro Companies recommends removing trapped debris and engaging the two sides before washing.
Heat application is product specific. Transfer Express offers heat-applied PVC patches but excludes heat-sensitive fabrics; Penn Emblem prohibits heat application for its PennPVC product. Follow the instructions for the exact patch and garment combination.
On waterproof shells, needle holes can affect the equipment’s waterproofness regardless of patch material. GORE-TEX explicitly warns that alterations and unsealed embroidery holes can compromise protection. Use an existing manufacturer-provided patch field or an attachment method approved for that item.
Test production samples on the intended equipment
Request samples made with the proposed production materials and backing. Use comparable artwork, finished dimensions and mounting positions, and record any construction differences. Keep an unexposed reference and obtain enough samples to repeat checks rather than relying on one piece that has already been damaged.
The following is a proposed purchasing screen. Agree exposure conditions, repeat counts and acceptance limits with the supplier before testing.
| Check | How to make the comparison relevant | What to record |
|---|---|---|
| Water exposure | Match expected spray or wetting; include soaking only where relevant | Face and backing condition, drying time and any moisture reaching the equipment interior |
| Dirt and cleaning | Apply comparable soil, allow the same drying period and clean within each product’s care instructions | Cleaning effort, remaining marks, trapped debris and post-cleaning grip |
| Abrasion | Use the expected contact material, such as a strap, under the same load and number of passes | Broken threads, scuffing, cuts, edge damage and logo readability |
| Repeated bending | Wear the garment while bending or crouching; load, empty and fold the bag as intended | Edge lift, creasing, cracking, backing separation, restriction and discomfort |
| Removal and reattachment | Repeatedly use the actual hook-and-loop panel; inspect after contamination and cleaning | Loss of engagement, lifted corners and separation between patch and backing |
| Care cycles | Follow the compatible cleaning and drying instructions for the complete item | Color change, puckering, shape change, adhesive failure and attachment damage |
Photograph samples before and after under consistent lighting. Evaluate appearance and function separately: a visible scuff may be acceptable while detachment is not. Possible acceptance criteria include readable identification, an intact border, secure attachment and no new backing separation after the agreed sequence.
A short sample check cannot establish years of outdoor life. If the product needs a quantified abrasion, weathering or water-ingress claim, have a qualified laboratory select an appropriate method and assess the finished construction.
Compare development, installation and replacement costs
Ask for quotes at the planned first-order quantity and realistic reorder quantities, with the same finished size, artwork, backing configuration and delivery scope.
For embroidery, review digitizing or setup charges, stitch coverage, design complexity, border finishing and backing. For PVC, review mold development, dimensions, color areas, relief and backing. Penn Emblem, for example, explicitly identifies a mold fee in its PennPVC ordering information. Other suppliers may include tooling in the quoted price.
Use this comparison:
Initial cost per usable installed patch = total development, sampling, supply, installation and delivery cost ÷ usable installed quantity.
Count included charges only once. Confirm whether a hook-backed quote also includes the loop piece and its installation. For reorders, ask whether the approved embroidery file or mold can be reused, and what design changes trigger new charges.
Then assess cleaning and replacement costs over the same intended period. Use sample observations and field records where available; treat unknown replacement rates as assumptions. A higher PVC quote may be worthwhile if testing shows easier cleaning for muddy equipment. Embroidery may offer better value when it passes the required checks and the textile appearance is central to the product.
Choose for the placement and expected use
- Frequently muddy backpack with an existing loop panel: Start with a low-profile, hook-backed PVC sample. Check cleanup, corner lift and grip after the panel gets dirty.
- Jacket, cap or outdoor uniform used in occasional showers: Start with a low-profile embroidered sample and a suitable thread specification. Compare comfort, appearance and cleaning performance.
- Position that folds or rubs constantly: Trial both finished constructions or relocate the patch. Keep size, thickness and edge exposure central to the decision.
- Waterproof shell or dry bag: Establish an approved attachment method first, then compare patch materials within that constraint.
Prepare the artwork, dimensions, quantity, placement photo, fabric details, expected exposure and cleaning routine before requesting samples. For an embroidered option, review YQX’s custom embroidered patches and submit those details for a construction review and quotation. If PVC remains a candidate, obtain its sample and quote against the same use requirements.